By the end of this hands-on guide you will have a complete, printable meal planner printable, a filled sample weekly dinner plan tailored to Texas seasonality, and a repeatable routine that saves 2–4 hours per week; expect to spend 90–180 minutes upfront. Skill level: beginner-to-intermediate (no nutrition certification required).
Introduction to Meal Planner Printable Guides
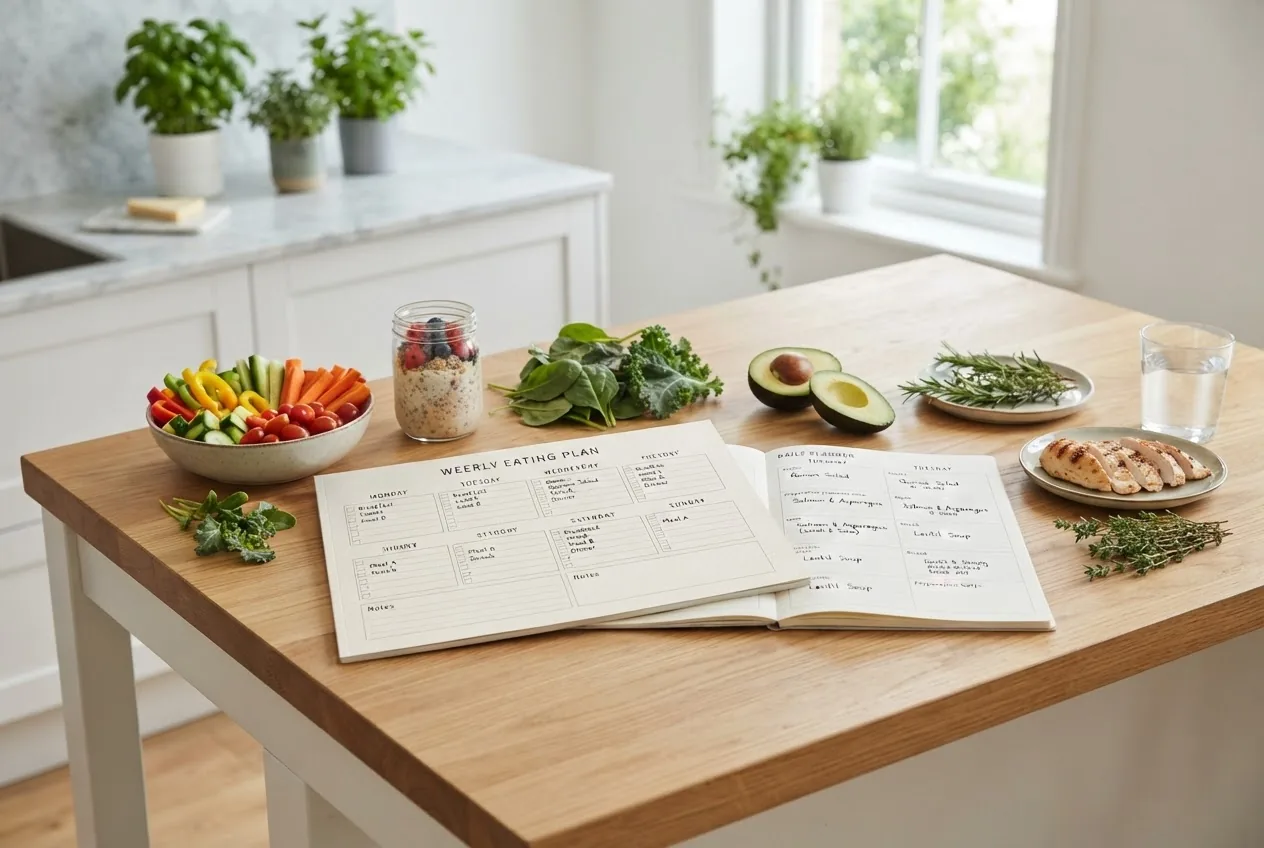
A printable meal planner is a simple, tangible tool that turns food intentions into an organized weekly or daily schedule. With clear sections for breakfast, lunch, dinner and snacks plus a grocery column and prep notes, a planner concentrates time-saving meal templates into one glance, improving meal prep efficiency and diet planning basics.
This guide shows you how to use both a weekly eating plan template and a daily eating plan template so you can create a consistent planned menu that supports balanced nutrition without relying on calorie-counting spreadsheets. I’ll describe examples for busy families, shift workers, and solo meal-preppers so you can adapt the printable to your routine.
Before you start with the steps below, gather the tools listed so your first planning session is fast and productive.
- Printed copies of the free printable planner (A4 or Letter) or a blank notebook
- Pens/highlighters and a ruler for layout
- Access to a calendar (paper or digital) and your typical weekly schedule
- Basic pantry inventory (5–10 minute check) and current grocery receipts
- Phone or computer for quick recipe lookups and seasonal produce check
Transition: Now that your workspace and materials are ready, let’s unpack the differences between weekly and daily planning and map out a practical workflow.
Understanding Weekly and Daily Food Planning with Meal Planner Templates
Effective meal planning balances two rhythms: the weekly view for scheduling variety and shopping, and the daily plan for portion control and execution. A well-designed weekly eating plan template helps you group similar recipes, reuse ingredients, and reduce food waste; a daily eating plan template breaks each day into meals and snacks with portion cues.
Follow these steps to build a combined weekly + daily system that actually works:
- Review your week first. Mark days with events, late shifts, or early meetings. Allocate 2–3 “speed meals” slots (15–25 minutes) on high-demand days and 1–2 “batch cook” slots (45–75 minutes) on low-demand days.
- Inventory pantry and fridge. Spend 5–10 minutes listing proteins, grains, and produce. Note items expiring within 3 days to move them to the top of the weekly plan.
- Choose 3–4 core recipes. Select proteins/veggie mains that scale (roast chicken, lentil chili, stir-fry). These form the backbone of a weekly food planner and allow flexible daily combinations.
- Assign recipes to days. Use the weekly eating plan template to place mains on days when you have time to cook and quick-assembly days for leftovers or salads. Reserve weekends for more time-intensive recipes if desired.
- Fill the daily slots. For each day, write breakfast, lunch, dinner, two snacks, and hydration notes on the daily eating plan template. Aim for one serving of fruit and two vegetable servings per day as a baseline.
- Create a consolidated grocery list. Transfer ingredients from the weekly template into categories: produce, protein, pantry, dairy, frozen. Estimate quantities (e.g., 3 cups spinach, 2 lb chicken breast, 1 dozen eggs).
- Plan portion strategy. Decide standard portions: 3–4 oz protein, 1 cup cooked grain, 1 cup raw veggies, 1 serving of healthy fat (1 tbsp olive oil or 1/4 avocado). Write these in your planner’s notes for reference.
- Schedule meal prep blocks. On the planner, block two prep sessions: one 60–90 minute session for batch cooking and one 20–30 minute session midweek for refresh/finish tasks.
- Adjust for preferences and region. Swap seasonal Texas produce (peaches, okra, sweet corn) where possible to lower cost and improve flavor. See the sample weekly dinner planner for Texas residents later in this guide.
- Finalize and print one copy for the fridge. Keep a second editable copy for updates midweek.
Transition: With your plan sketched, the next section explains how to use the printable itself day-to-day, including grocery list integration and portion practice.
How to Use a Meal Planner Printable Effectively
A practical meal prep planner is an operational document: it tells you what to cook, when to cook, and exactly what to buy. Here’s a step-by-step how-to with concrete examples that turn the template into habit.
- Set a weekly planning appointment (60–90 minutes). Treat planning like a calendar meeting: pick a consistent day (Sunday or Friday), and block one hour. Example: Sunday 10:00–11:30 — inventory, plan seven dinners, print the grocery list.
- Use the top row for priorities. On your printed weekly planner, write two priorities: “Protein for 4 dinners” and “Two vegetable-heavy lunches.” This focuses shopping and reduces impulse buys.
- Build a planned menu with templates. For each evening, write the main, a side, and a vegetable. Example Tuesday: “Black bean tacos (main), brown rice (side), sautéed cabbage (veg).” Record batch-cook notes (cook extra black beans = +2 servings).
- Create the grocery list by aisle. Transfer ingredients to your list grouped by store sections: Produce, Meat/Seafood, Bulk/Grains, Dairy/Eggs, Frozen, Pantry, Misc. Example quantities: 2 lb boneless chicken, 6 tortillas, 1 head cabbage, 1 lb peaches.
- Prep with a 90-minute session. Batch-cook staples: roast 2 lb chicken at 400°F for 35–45 minutes, cook 4 cups dry brown rice (yields ~12 cups cooked), wash and chop 6 cups mixed salad greens. Portion into 3–4 airtight containers for fast lunches.
- Use daily micro-plans for execution. Each morning consult your daily eating plan template: pack lunch, pre-portion snacks (1 oz nuts, 1 cup cut fruit), and set a 25-minute dinner start time that accounts for reheating.
- Apply portion control basics. Use visual cues: a palm-sized portion of protein (~3–4 oz), a cupped hand for carbs (~1 cup cooked), and two fist-sized portions for vegetables. Write these on the planner’s margin for reference.
- Track leftovers and reduce waste. Add a weekly “Leftover Night” column to the planner. Mark where cooked items were used and note reuse ideas (roast veggies → breakfast hash).
- Example: Busy working parent scenario. If you have three weekday evenings under 30 minutes, plan two slow-cooker or sheet-pan recipes and one quick stir-fry. Prep grains and chop vegetables during the Sunday session, store in labeled containers.
- Sync with shopping. When shopping, stick to the list and allow one 15-minute flexibility item (e.g., seasonal fruit). This saves time and supports budget-friendly meal plans.
Transition: Next, compare printable styles so you can choose the layout that matches your lifestyle and balanced diet goals.
Types of Meal Planner Printables for Balanced Diets
Choosing the right template depends on your planning horizon, household size, and whether you prioritize batch-cooking or daily flexibility. Below is a comparison table of common printable templates and their best uses.
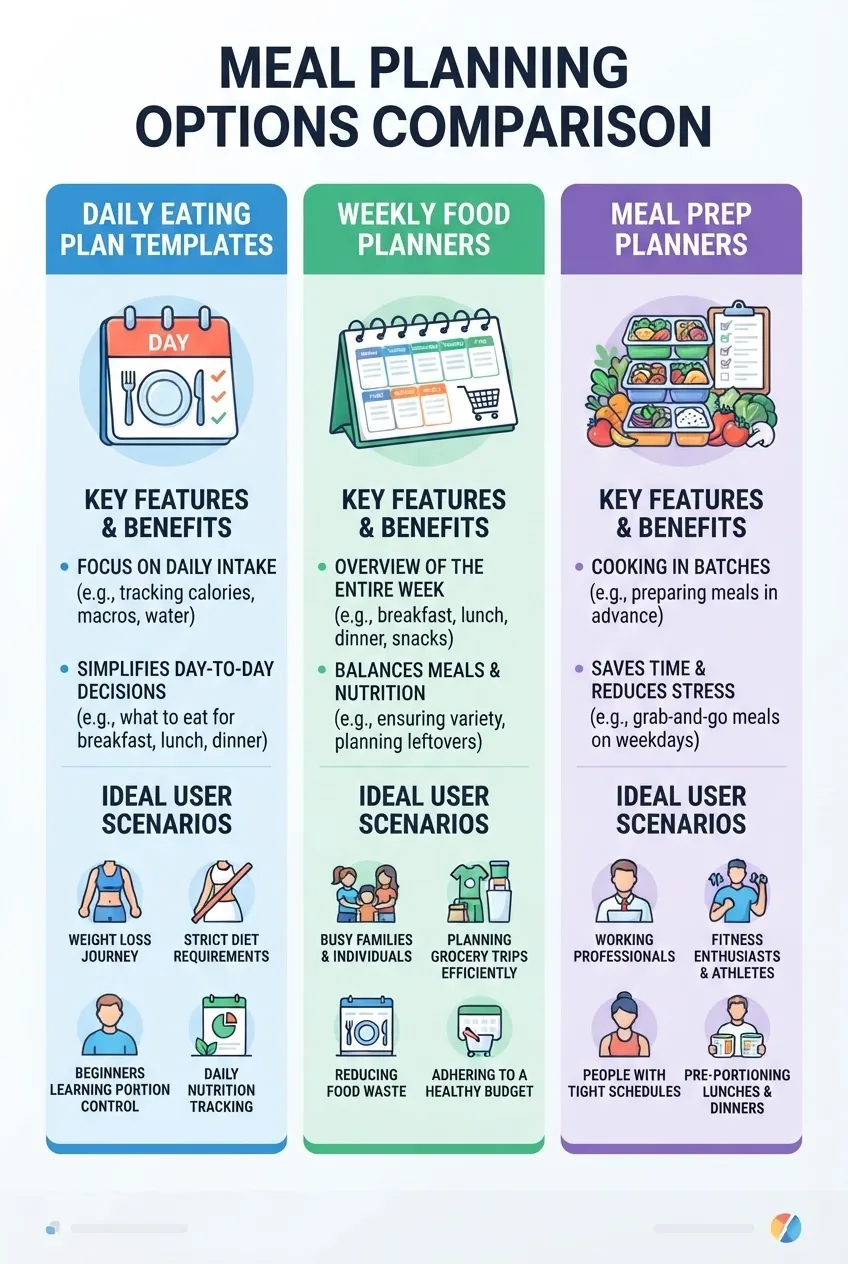
| Template | Key Features | Ideal For |
|---|---|---|
| Daily Eating Plan Template | Meal times, portion notes, hydration tracker | People tracking meal balance day-by-day |
| Weekly Food Planner | Weekly view, grocery list column, prep notes | Households coordinating shopping and dinners |
| Meal Prep Planner | Batch-cook schedule, storage & reheat instructions | Meal preppers who cook once and eat multiple times |
These printable templates pair well with visual resources that show portion sizes and plated examples. For more imagery on portioning and plating, see our companion guide on visualizing healthy meal plans.
If you want supporting worksheets, our printable nutrition templates are a direct complement to the planners.
Transition: With a template style chosen, embed balanced diet principles into the planner—this next section links to foundational guidance and portion references.
Incorporating Balanced Diet Principles in Your Meal Planner Printable
To make a planner truly support health, align meals with established nutrition guidance. According to the 2023 USDA Dietary Guidelines (government report), aim for varied vegetables, lean proteins, whole grains, low-fat dairy, and limited added sugars. For heart-health-focused choices, the American Heart Association suggests prioritizing fruits, vegetables, and unsaturated fats.
When you add these components into a weekly or daily slot, the planner becomes nutrition-forward rather than just schedule-forward. For deeper context, review our balanced diet principles.
Key nutrient and portion resources to include in your planner’s margins:
- adequate intake requirements — use this to mark micronutrient reminders for iron, calcium, vitamin D, and fiber.
- portion and serving sizes — include visual cues (palm, fist, cupped hand) as part of the planner.
- balanced nutrition guide — for the full framework on food groups and meal balance.
Nutrition science backing: the Academy of Nutrition and Dietetics supports planned meal prep as a strategy to improve dietary adequacy and reduce ultra-processed food intake; see their position statements for evidence-based tips.
Caveats and trust signals: If you have medical conditions (diabetes, renal disease, food allergies) your planner must be adapted by a healthcare professional or registered dietitian. According to a 2022 Academy position statement (professional guidance), individualized counsel is necessary for medical nutrition therapy.
Transition: Below is a practical sample weekly dinner planner filled with Texas-seasonal produce and specific recipes so you can copy it directly into your printable.
Sample Weekly Dinner Planner Template for Texas Residents
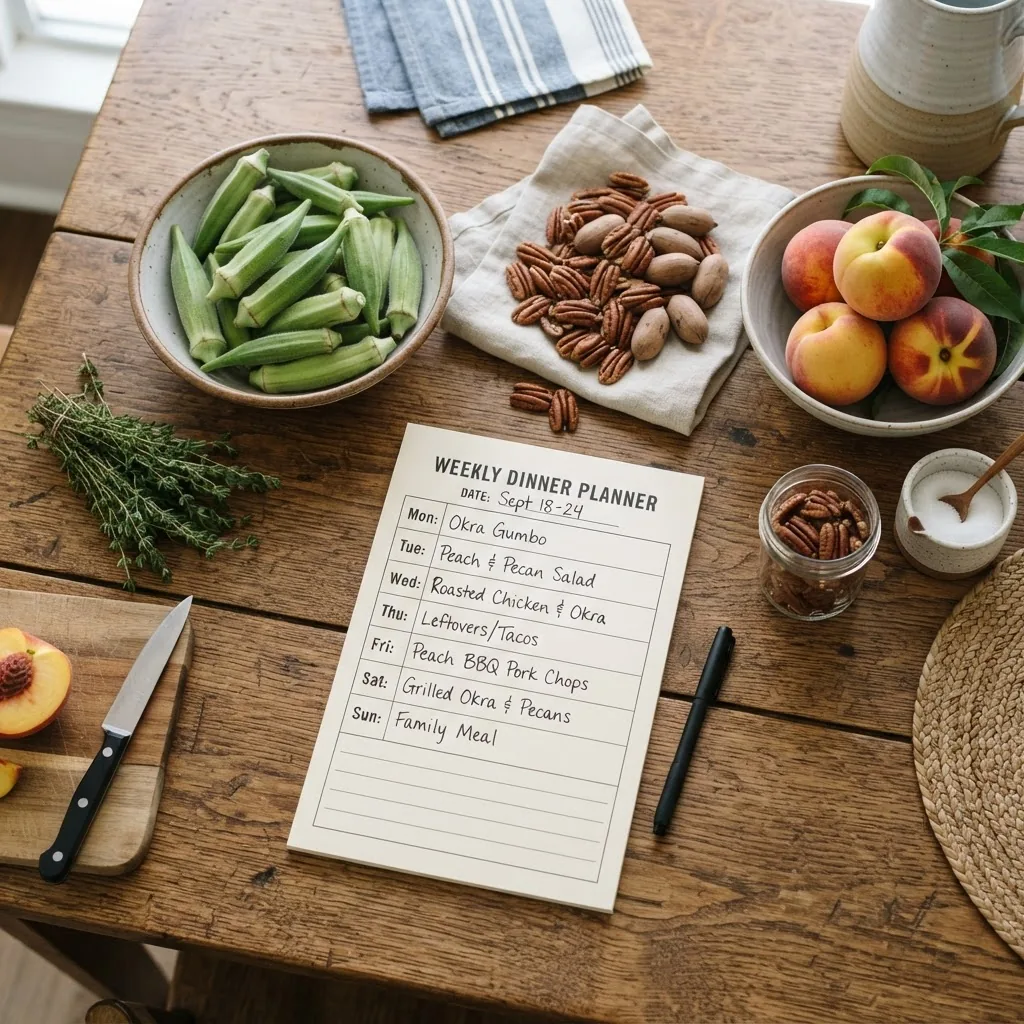
This sample weekly dinner planner uses regionally available ingredients to cut cost and boost flavor. The template assumes four servings per meal and two batch-cook sessions: Sunday (90 minutes) and Wednesday (30 minutes).
Sample week (Sunday–Saturday)
- Sunday — Sheet-pan roast chicken with sweet corn and roasted peaches. Prep: roast 2 lb chicken at 400°F for 40–45 minutes; halve 4 peaches and roast 15 minutes at 425°F. Cook 2 cups dry brown rice for lunches.
- Monday — Black bean and roasted pepper tacos with cabbage slaw. Prep: batch-cook 3 cups black beans (or 2 cans), make slaw with 3 cups shredded cabbage and lime vinaigrette.
- Tuesday — Tex-Mex grilled fish bowls with avocado and pico de gallo. Use 1.5 lb firm white fish; serve over 2 cups cooked quinoa; add 1 avocado sliced per 2-3 people.
- Wednesday — Okra and tomato gumbo with brown rice. Prep: simmer 1 lb okra with 2 cups diced tomatoes, onions, and 1 tbsp olive oil for 25 minutes; reserve for two meals.
- Thursday — Leftover night / Salad bowls using Sunday roast and Wednesday gumbo. Combine proteins with fresh greens (6 cups mixed greens) and a simple vinaigrette.
- Friday — Grilled vegetable and pecan pesto pasta. Roast 3 bell peppers and 2 zucchini; blend 1/2 cup pecans with basil and 2 tbsp olive oil; toss with 12 oz whole-grain pasta.
- Saturday — Peach yogurt parfaits for brunch and quick shrimp tacos for dinner. Use 1 lb shrimp, 8 small corn tortillas, and leftover pico de gallo; parfaits: 2 cups Greek yogurt, 2 peaches sliced, 1/4 cup granola.
Grocery summary (quantities for 4 servings each): 6–8 cups mixed vegetables, 4 lb total protein (chicken + fish + shrimp), 4 cups cooked whole grains, 6 pieces seasonal fruit. Use the planner’s grocery column to list exact weights and packaging sizes for your store.
For a shopping checklist focused on heart-healthy options, see the Mediterranean list for ideas that pair with the weekly dinner planner: healthy meal shopping list.
Transition: With an example in hand, you can customize planners to preferences, budgets, and time constraints—here are actionable tips to make the printable yours.
Tips to Customize Your Meal Planner Printable
Customization increases adherence. Use these practical, numbered tips to adapt the planner for dietary preferences, budgets, and time savings.
- Swap proteins by preference. For vegetarians, replace chicken/fish with 2 cups cooked lentils or 2 cups tempeh per meal. For omnivores, keep half-portion meat and add beans to stretch meals.
- Adjust portion targets for goals. For weight loss or calorie-focused plans, review our balanced weight loss meal plans and scale portions accordingly.
- Use moderate-calorie templates when appropriate. For moderately reduced calories, consult our healthy balanced diet meal plans to inform portion sizes and meal frequency.
- Apply consistent carbohydrate strategies. If you follow a consistent carb approach, integrate templates from our CCHO guide to place carbs evenly across meals: consistent carbohydrate meal planning.
- Budget-friendly substitutions. Buy in-season Texas produce (peaches, cantaloupe, okra) and frozen berries for smoothies; swap fresh fish 1 week for canned tuna to cut cost by ~30% per serving.
- Time-saving hacks. Use a slow cooker for 6–8 hour recipes, pre-chop vegetables into 1–2 cup containers, and freeze single-portion meals for 2–4 week storage.
- Labeling and rotation. On the planner, mark “Use by” dates and rotate proteins weekly to maintain variety and micronutrient diversity.
- Meal swaps for children or picky eaters. Keep a “swap list” column with 3 kid-friendly options (grilled cheese, bean quesadilla, diced roast) that match macronutrient profiles of main recipes.
- Integrate special diets. For plant-based or allergen-free needs, list swap quantities (1 cup cooked chickpeas = ~20 g protein) directly in the planner’s notes.
- Save templates for reuse. Keep a folder of weekly templates; repeat high-adherence weeks every 3–4 weeks to minimize planning load.
Transition: If you hit hurdles while planning or following the printable, the next section answers common problems with practical fixes.
Troubleshooting Common Meal Planning Challenges
Q&A format addresses frequent roadblocks and quick remedies.
Q: I get bored with repeating meals—how can I keep variety?
Rotate core proteins and switch sauces weekly. Keep a “swap jar” of 8 spices/sauces (salsa, pesto, tahini) to transform the same base meal into different flavors in under 5 minutes.
Q: I run out of time midweek—what then?
Use your midweek 20–30 minute prep session: reheat batch-cooked proteins, assemble salads, and use frozen vegetables to save 10–15 minutes per meal without losing nutrition.
Q: Leftovers pile up and I waste food.
Designate one “Leftover Night” and freeze single portions within 48 hours. Label with date and reheating instructions; frozen meals keep 2–3 months at safe quality.
Q: How do I keep portion control practical for the family?
Serve family-style with plated portion guides: 3–4 oz protein per adult, 1 cup cooked grain, and 1–2 cups vegetables. Place extra snacks out of immediate reach to limit grazing.
Q: Are printable planners flexible for shift work?
Yes — shift your “day” markers to match sleep schedules and plan two high-energy meals around your longest awake period. Batch-cook proteins that reheat well for night shifts.
Q: I dislike meal planning—how can I stick to it?
Start with a 3-day plan, not seven. Success breeds habit; aim for 3 wins per week (prepared lunches, one batch cook, one leftover night) and build from there.
Q: Can I use printables for medical conditions?
Use printables as organizational tools only. For specific conditions like kidney disease or Type 1 diabetes, consult a registered dietitian for individualized meal prescriptions.
Q: How can I ensure nutrient adequacy with a planner?
Cross-check your weekly planner against recommended food group targets (vegetables, fruit, whole grains, protein, dairy) and consult the adequate intake requirements for micronutrient thresholds.
Transition: You now have practical fixes and a reproducible weekly example. The final section explains how to download, print, and maintain your free planner PDF.
Conclusion and How to Download Your Free Printable Meal Planner PDF
You should now have a filled sample week, a tactical workflow for planning and prepping, and customization strategies for Texas produce and personal preferences. To get the free printable, download the PDF, print two copies (one for the fridge, one for edits), and reserve 60–90 minutes weekly to update it.
Download tip: Print at 100% scale on Letter or A4 and fold into a kitchen-sized clipboard. For more authoritative guidance on healthy planning and portioning, consult the USDA dietary guidance and the American Heart Association’s meal planning resources:
USDA Dietary Guidelines — American Heart Association — Academy of Nutrition and Dietetics.
Final practical CTA: Download the free planner now, print one copy for the fridge, and set a 60-minute planning appointment this weekend to implement your first weekly menu.
Before you finish — Hands-on checklist
- Printed at least one free meal planner PDF (fridge copy)
- Filled out seven-day dinner plan with portion notes
- Created a categorized grocery list with quantities
- Scheduled two weekly prep sessions (Sunday 60–90 min; midweek 20–30 min)
- Noted substitutions for dietary preferences and Texas seasonality
Common mistakes and how to avoid them
I often saw people underestimate produce amounts and end up with insufficient veg midweek; I now recommend listing cups or weights (e.g., 6 cups salad greens) rather than vague items. I also watched planners fail because users didn’t schedule prep time—blocking a 60–90 minute slot on the calendar prevents that. Finally, not labeling leftovers caused waste; I always mark date and portion on containers.
When to call in a professional
If you have chronic disease, need a medically prescribed nutrient plan, or face serious food allergies, call a registered dietitian or your healthcare provider. Use a professional when you require individualized caloric prescriptions or medication-nutrition interactions managed.